What's new in YourTradebase?
We now take card payments (and so do you!)
21 April 2020
Our latest update’s a biggie. Because from today, you can tell your customers you take card payments. Yep, you.
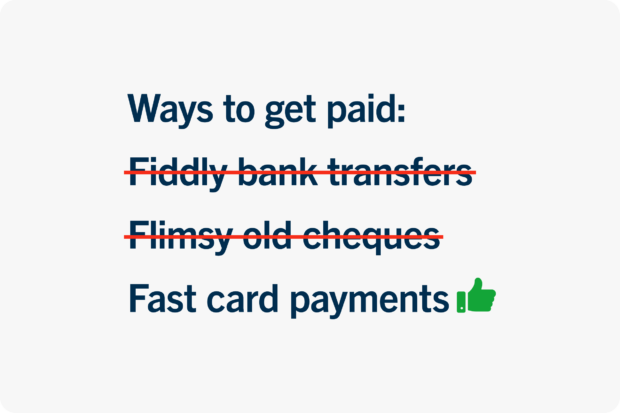
No more fiddly transfers or flimsy cheques. Just email your invoice, add a shiny new ‘Pay online’ button and get paid super fast, super securely.

Nobody likes waiting to get paid. You do the job, you send the invoice… and then what? Your customer makes a bank transfer, when they eventually get round to it? Or worse, they finally post you a cheque, then it sits in your kitchen for a week before you get time to go to the bank? It’s not the slickest system.
So have we fixed it? You bet…
Get your money faster
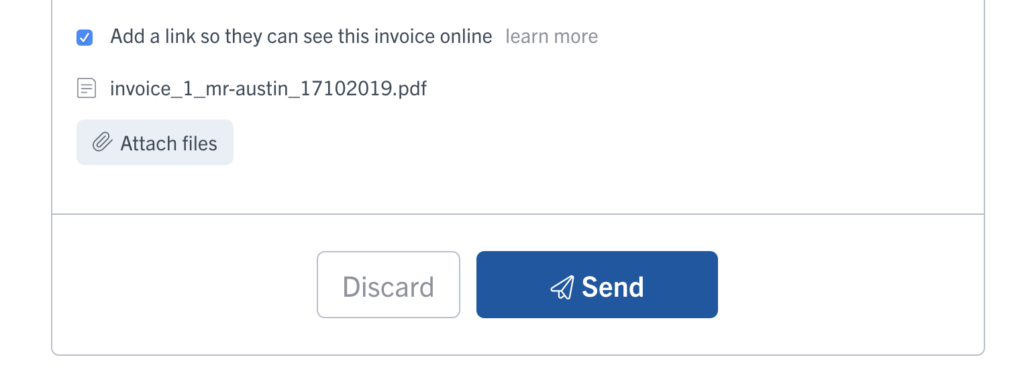
From now on, whenever you write an invoice, you’ll be able to add a ‘Pay online’ button, so your customers can choose to pay their bills instantly online, using their credit or debit card.
When they do, we’ll send you (and them) a notification to say the payment’s been successful, and we’ll change your invoice status to ‘Paid’. Job done.
Say hello to Stripe
We’re tradespeople, not banking people, so to bring you a top-notch payment system, we’ve brought in some expert help. We’re working with the team at Stripe – a really secure, no-nonsense online payment platform used by millions of businesses, all over the world.
These guys know their stuff. They’ve built a simple, streamlined system that meets the toughest safety standards in the payments industry, keeping your hard-earned cash safe as houses. It’s easy to use and it gets you paid fast.
How do I get started?
It’s totally free to set up a Stripe account and link it to YourTradebase. Stripe doesn’t charge subscription fees, and all you need to get started are your bank account number and sort code. We’ve even put together a quick step-by-step guide to walk you through it.
So how does it work? Well, your customer can make a card payment as soon as they open their invoice.
And they can do it anywhere, on any device, even their phone. Our reckoning is, the easier we make it to pay, the faster customers will do it.
Once they’ve paid, you’ll get a notification to say the money is pending in your Stripe account. It’ll take 7 days to drop into your bank account, then you’re good to go.
What will my customers see?
Does it cost me anything?
Stripe takes a small fee from every transaction to pay for their pretty nifty system. So, if your customer pays with a card from the UK or EU, Stripe takes 1.9% plus a 20p fee.
To give you an example, if your invoice comes to £300, they’ll take £5.70 + 20p. For the time and hassle it’ll save you, we think that’s a pretty good deal.
If your customer uses a non-EU card, Stripe will take 3.4% + 20p.
At the moment, we’re just launching online payments for our UK tradespeople, but if you’re in the US or Australia, we haven’t forgotten you – we’re working on it!
What if I don’t want to take card payments?
No problem. At the top of every invoice, there’s a toggle that lets you choose whether to accept card payments or not.
If you’ve connected to your Stripe account, you’ll be able to turn it on and off on an invoice-by-invoice basis.
Totally up to you. Take a closer look at how to do it here.
What’s next?
Want to find out a bit more about Stripe? Here’s the lowdown on what they do. Like to learn more about getting started? Check out our step-by-step set-up guide. Got questions? Just shout.
We think this update’s a real game changer and we can’t wait to see how it helps you do your thing, better than ever.
Happy invoicing!
Send smarter-looking emails
12 March 2020
We’ve cracked open a toolbox full of tricks to help you write great-looking emails that grab your customers’ attention and make you look like a total pro…
When it comes to making an impression, little things make a massive difference. So today, we’re giving you one more way to show what a pro you are – every time you send an email.
Here’s the deal. Until now, when you sent emails in YourTradebase, your message appeared in plain old text. No fuss, no formatting, just the basics.
It wasn’t bad, but it wasn’t… brilliant. We thought it was time to switch things up.
So from today, we’re bringing in rich-text formatting.
What’s that now? Well, it’s a simple change that puts a whole bunch of new tricks at your fingertips. Even better, they’re super quick and easy to use.
Got a really important point to get across? Bung it in bold or add some italics. Want to include a list? Bring out the bullet points. Like to add a link? Just drop it in. Handy, right?
Here’s a quick before and after…
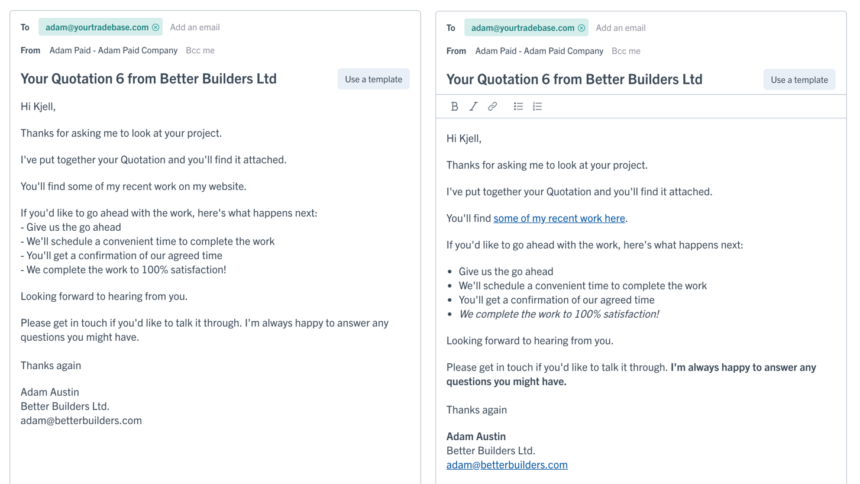
You can format text using the icons, or with the keyboard – using CTRL+B or CTRL+I.
Here’s a nifty video of the whole thing in action…
Simple stuff. Smarter messages.
Happy emailing!
Collect customer signatures on your printed job sheets
17 December 2019
Need to capture a scribble from your customer? Our latest update has you covered…
If you’re printing job sheets to organise your day, and need to collect customer signatures when you’ve completed your work, then this update makes things a lot easier!
Start collecting customer signatures on your job sheets ✍️
Here’s how they look:
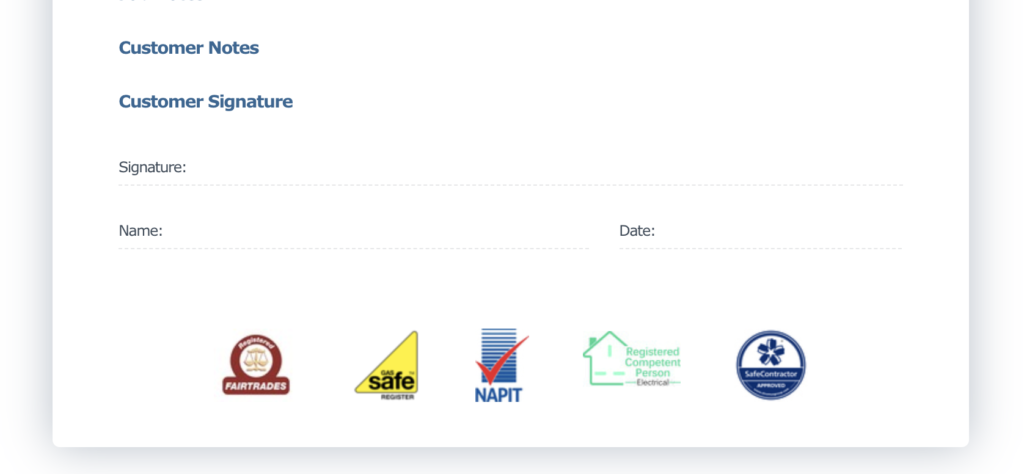
You can add customer signatures to any job sheet by visiting it, selecting Customise > Show customer signature. You’ll then get a section of your job sheet ready for that scrawled signature.
Start collecting signatures today on your job sheets today!
Capture extra customer info so it’s always at your fingertips
10 December 2019
Want to keep a note of how a customer heard about you, what kind of boiler they’ve got or when it next needs servicing? Well now you can – and it’s super easy too…
A couple of weeks back we added a new feature, letting you tailor payment terms to each individual customer. Because everyone’s different, right? Well, it went down a storm, so we’ve decided to take things a bit further and help you capture whatever extra info you want about your customers – so it’s right at your fingertips when you need it.
It might be that you want to keep track of how people hear about you, so you can see whether that ad you put in the paper is earning its keep, or look after those customers who regularly recommend you.
On the other hand, maybe you’d like to see at a glance what kind of kit you’ve installed for people, whether it’s a boiler, a bath or a brand of patio slabs. Being able to reel it off in seconds isn’t just handy – it’ll make your customers feel remembered, valued and in safe hands.
We’ve made it really quick and easy to do. And even better, you can add as much extra info as you like. Just repeat the handful of quick steps below until you’re all done.
Here’s how it works
Just go to Settings > Customers, click on ‘Add some extra customer info‘ and type in the name of the info you’d like to capture, for example “Boiler type”, “How they heard about us” or “Favourite biscuits”. Here’s that in action:
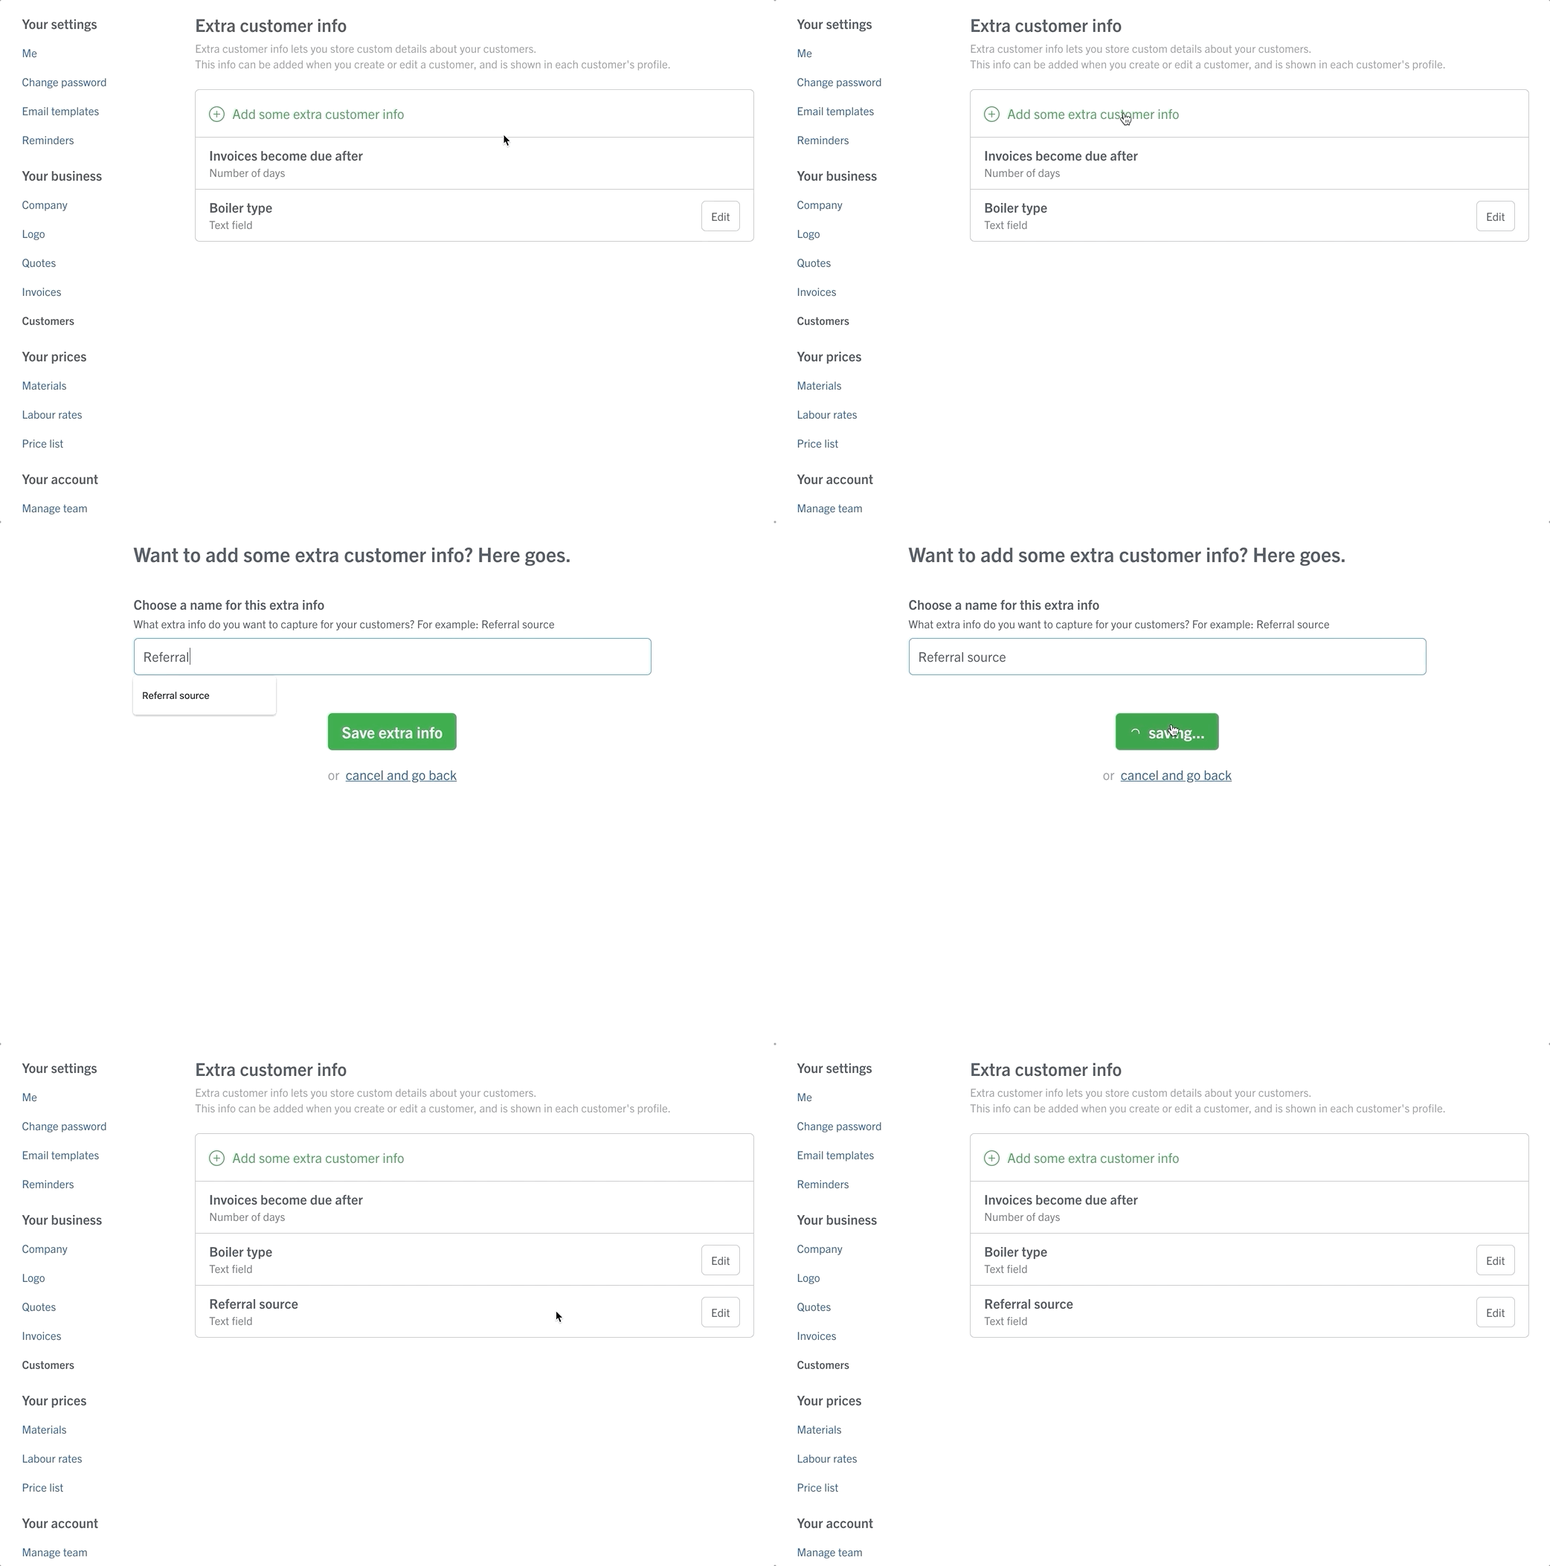
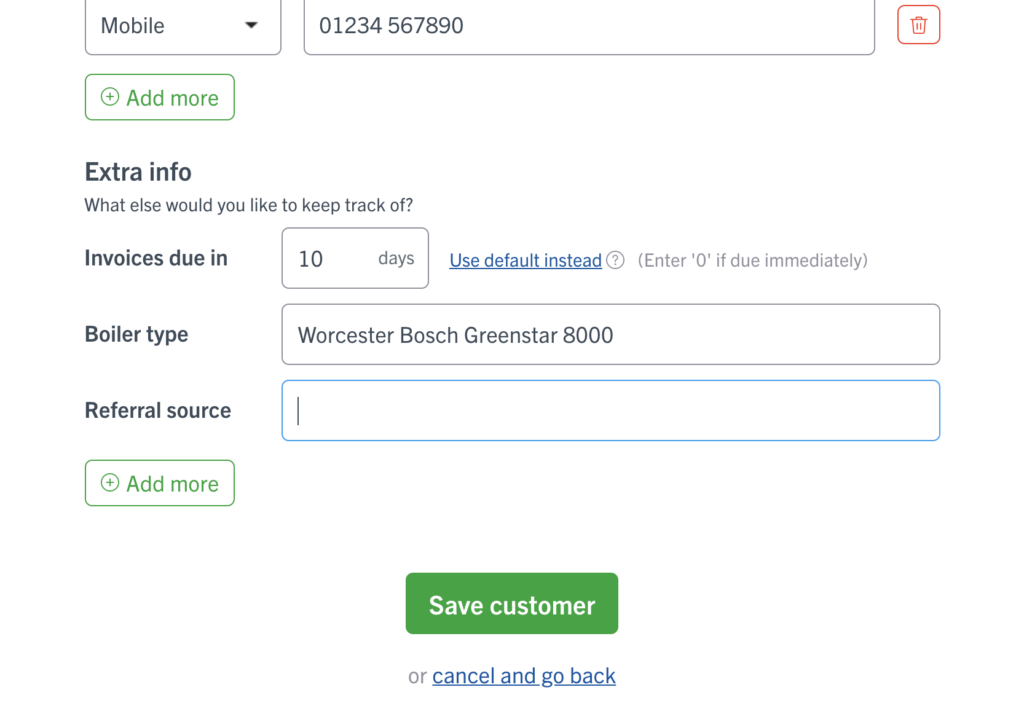
Once that’s done, you’ll see your new question every time you create a customer or edit an existing one.
And once you’ve added the extra info in (Favourite biscuits? Hobnobs), you’ll see it whenever you visit that customer’s profile. Nifty.
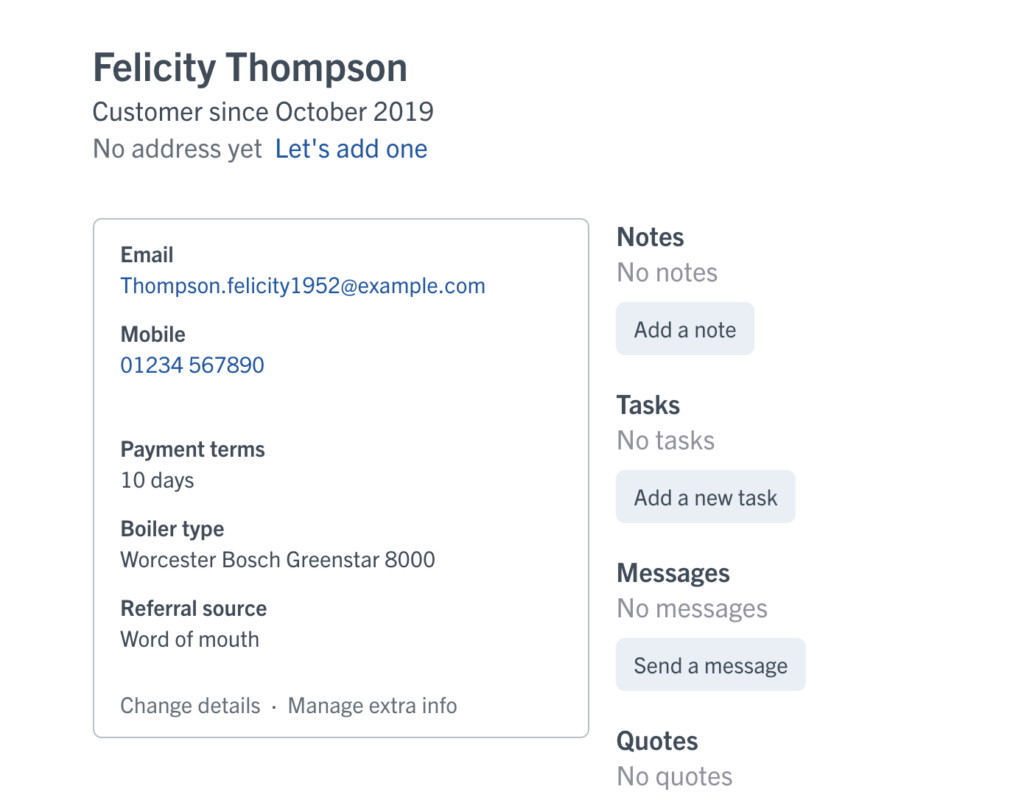
So, get all the info you need, every time. And if you need any help, just shout.
Colour code your team
14 November 2019
With one nifty little update, we’re making it easier to see who’s doing what, at a glance – great for busy teams and frazzled gaffers everywhere…
Sometimes it’s the little things that make all the difference. That’s the thinking behind our latest update – the option to colour code your team members in a few quick clicks.
It only takes a minute to give everyone on your team a different colour, but it’ll make your schedule so much easier to read. You’ll be able to spot who’s working on what, when and where, faster and with less faff than before. Here’s how it works…
- Visit your Settings > Manage team
- Choose a team member and click ‘Edit’
- Choose a colour and click ‘Save this team member’
- Job done!
You can also choose a colour whenever you add a new team member to your account.
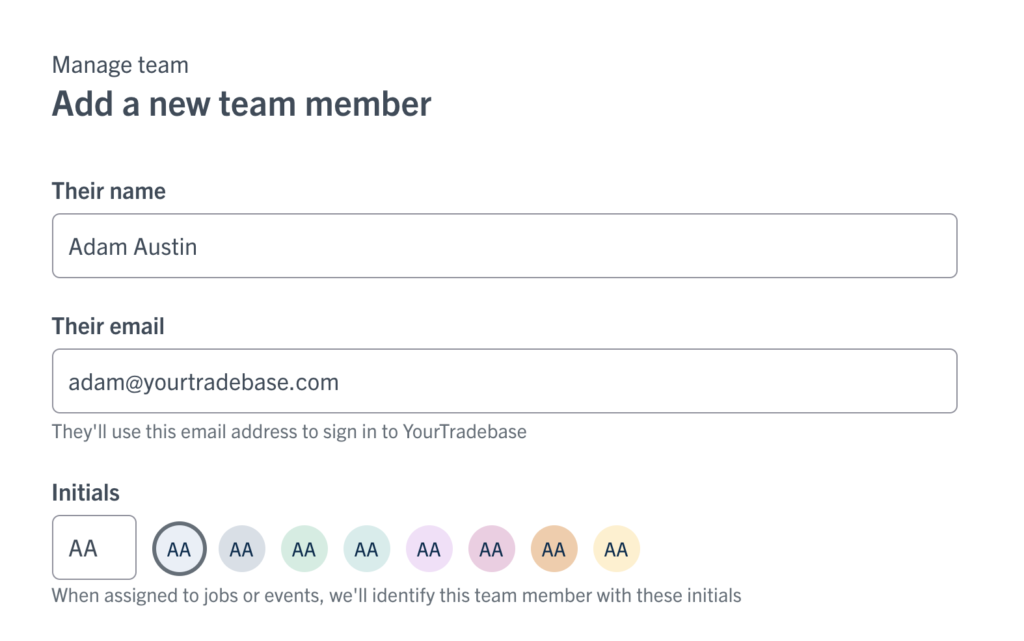
Once you’re all set up, we’ll automatically show your chosen colours in your schedule, just like this:

Happy colour coding!
Let your customers see invoices online
One thing we’ve learnt along the way – the easier it is for people to pay you, the faster they’ll do it. Today’s quick update is all about making that happen…
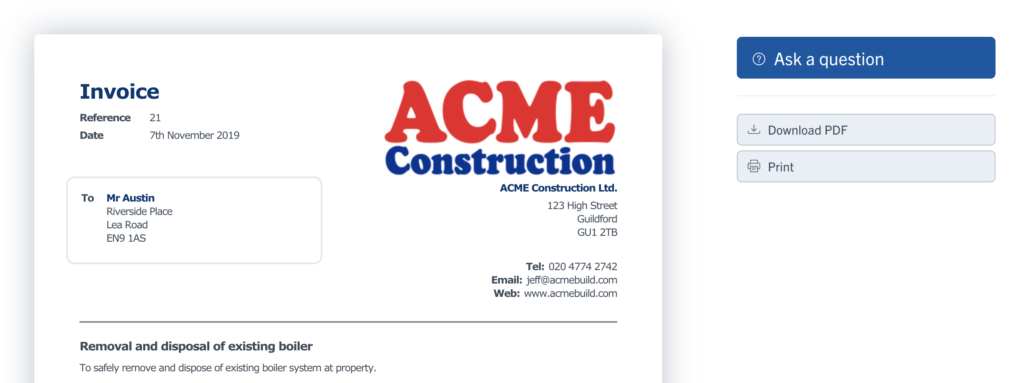
Whenever you send a quote or estimate in YourTradebase, you’ve got the option of letting your customers open it up online. They can read it, download it, print it, ask questions about it and (fingers crossed) accept it on any computer, tablet or mobile.
It’s a quick, easy way to show your customers you’re a pro, build their trust and make their lives easier. So today we’re taking it one step further, giving you the option of doing exactly the same with your invoices.
From now on, you’ll be able to let your customers read, download, print and ask questions about their invoices online too. It’s all about speeding up the processes that stand between you and pay day. And that’s got to be good news, right?
Here’s how it works
Set and save invoice terms for each of your customers
13 November 2019
Today’s update’s all about tailoring invoice terms to individual customers – saving you time, reducing faff and keeping your regular customers happy. Let’s take a look…
When you write invoices in YourTradebase, you’ve always been able to choose how long before they’re due. But we know lots of you like to be able to give different customers different terms. Different strokes for different folks, right? Fair enough.
So, today’s update makes that easy. Now you can pick payment terms for each individual customer, whether they’re seven days, ten days, 30 days or anything else. You can also choose whether to deduct CIS for that customer too.
Once you’re done, just save those preferences and the next time you send that customer an invoice, we’ll drop them in for you. So, if you’ve chosen 30 days, we’ll give the invoice a due date that’s 30 days away. Easy.
Here’s how to do it…
Click on the customer’s profile and the edit (from the actions ‘…’ menu), look for the ‘Invoice due in’ box and type in the number of days. Right below that you’ll see ‘Deduct CIS?’. Just tick the box if that’s what you want to do, then click ‘Save customer’ to, well, save the customer. All done.
It’s just the same for brand new customers. When you’re on the ‘Create a customer’ screen, you’ll get the same options for invoice dates and CIS. Just make your choices and click ‘Save’.
Want to see what that looks like? Here’s a quick screenshot:
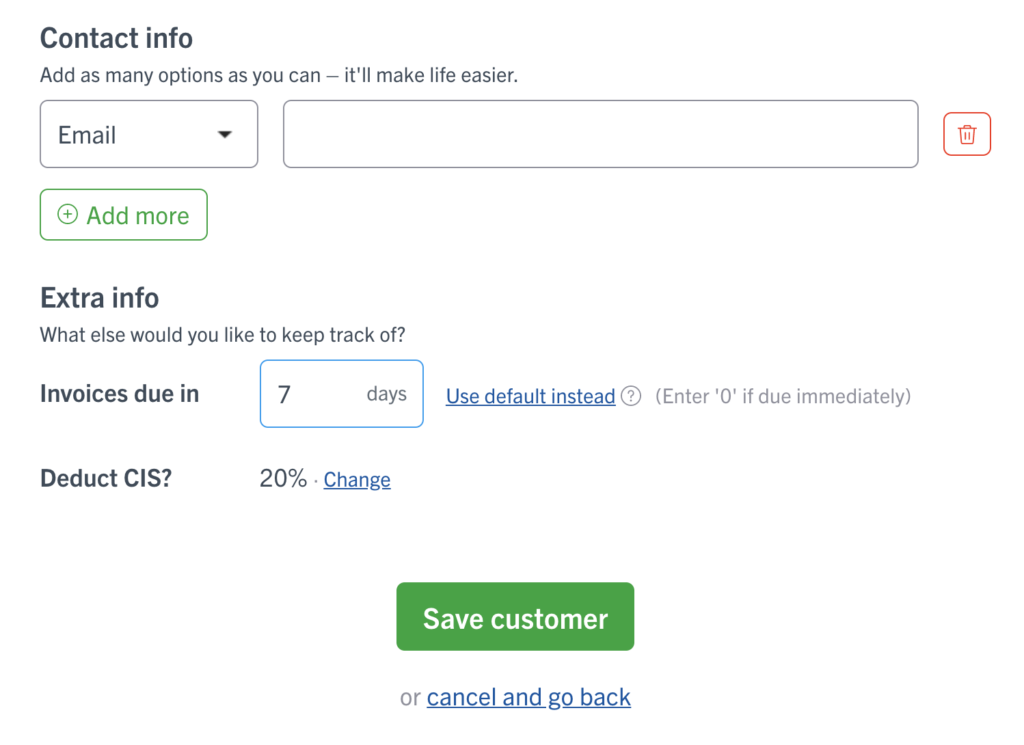
And that’s it! You’ll be making sure your invoices get paid without hitting any speed bumps, and keeping your customers happy too. Give it a go.
Say hello to your new schedule
9 October 2019
In this game, it pays to be organised. So, we’ve rolled up our sleeves and whipped up a brand new schedule that’s easier to use, add to, filter and print. It’s everything you need to know, at a glance, and you can try it from today…
We’ve always had a calendar in YourTradebase, but until now, using it to check your schedule wasn’t as easy as it ought to be. Getting a clear picture of what you were doing and where you were going took a lot of clicks – and you couldn’t add new events straight from the calendar.
It wasn’t the greatest, and we knew we could do better. So we’ve had a complete revamp, and we’re really happy to be launching our brand new schedule today.
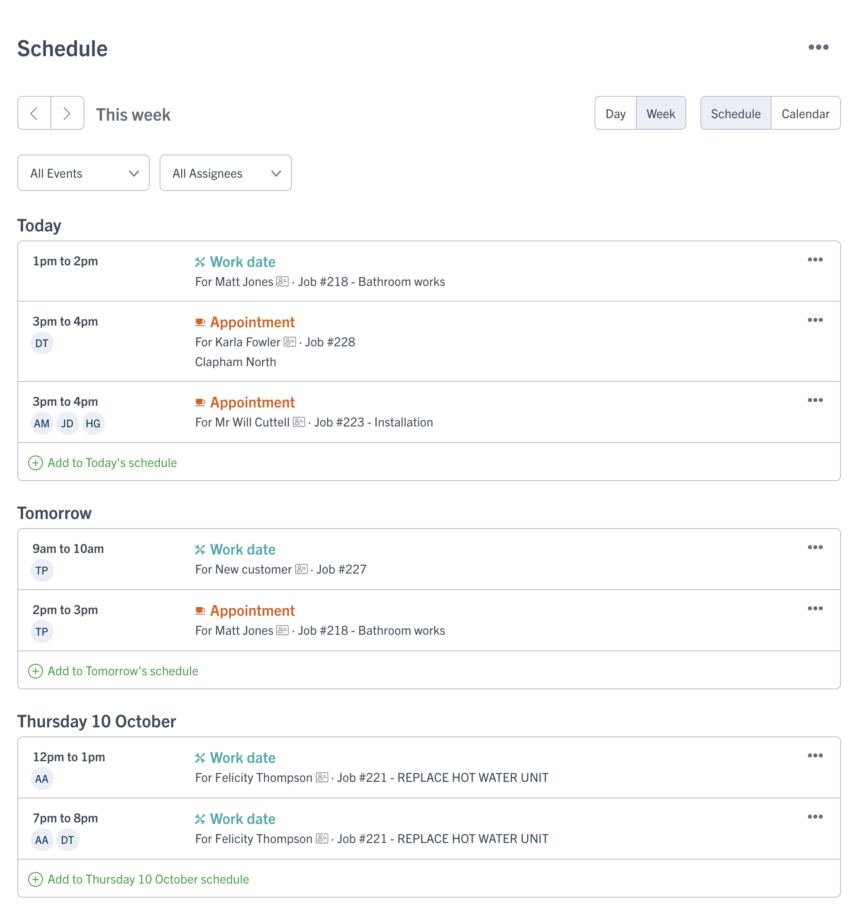
It gives you a super smart, simple list of everything on your plate – easier to navigate, with fewer clicks and handy filters that let you search by event type or team member.
You can view it any way you like – by day, by week, in the classic calendar format or even on paper. Yep, we’ve made sure it’ll print great-looking lists without any faffing around.
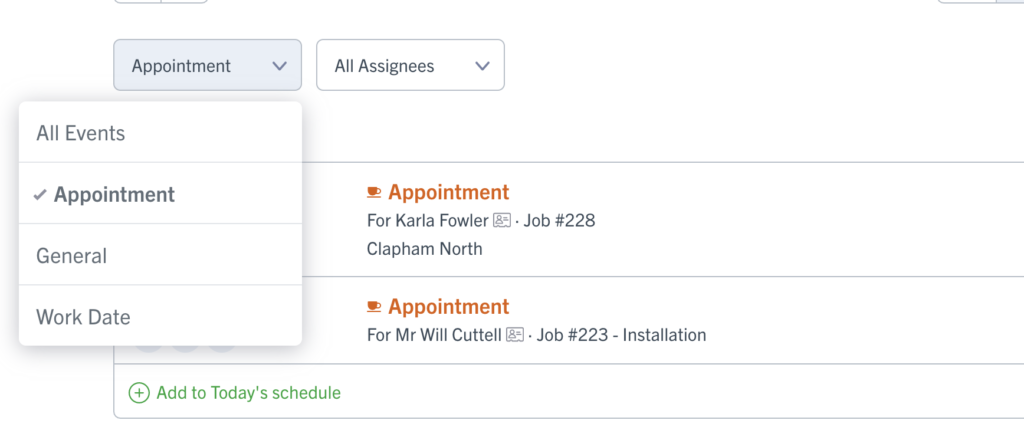
Plus, to make life easier, you can now add events straight from the schedule screen (no more diving into jobs to add new dates). You can even add in lots of extra details to help you keep tabs on your jobs – just by opening up our brand new activity stream feature.
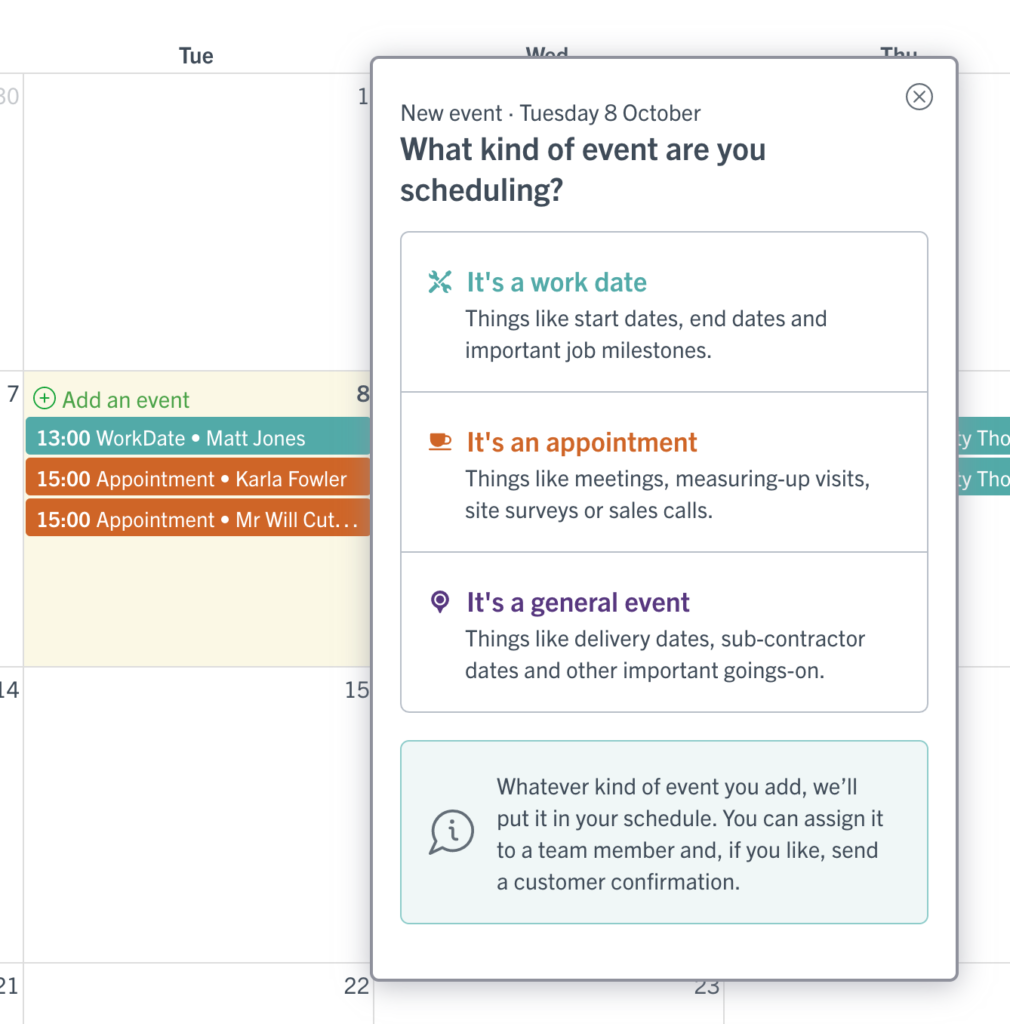
Like a look? Here’s a quick run-through.
you can check out your own schedule right now by going to the new ‘Schedule’ tab in YourTradebase.
Have fun!
New tags for nippier emails
29 August 2019
Making everyday jobs easier is what we’re all about, so we just wanted to let you know about a handy update we’ve made to our email templates. From today, you’ll be able to send your emails faster thanks to a few nifty new email tags. Let’s take a look.
What are email tags?
Think of them like shortcuts, or signposts, that tell YourTradebase to pull information into your email from elsewhere. They save you looking up and typing out the same details again and again, making it quicker and easier to get your admin done. You can use them in your estimates, quotes, jobs and invoices – and now in your templated emails too. The new ones look like this…
Customer address
Drop the {{customer_address}} tag into your email templates, and whenever you’re emailing a customer through YourTradebase, we’ll automatically find and drop in their address. It’ll appear on one line, like this:

Job address
Want to add job addresses into your emails? No problem. The {{job_address}} tag does just that. Add the tag to your email templates and we’ll swap it out for the address of the job, which you’ll see on one line, like this:

Job start date
Using an email template to send a customer a job update? Or to let them know when you’re starting on site? Just add the new {{job_start_date}} tag and we’ll replace it with the first work date you’ve got in your schedule for that job. Easy. You’ll see it on screen like this:

More tips on tags
For a guide to all the email tags you can use in YourTradebase – and how to do it – head over here: https://help.yourtradebase.com/article/69-using-tags-in-your-email-templates
And if you’d like to learn more about using email templates, we’ve got you. Here’s a quick how-to: https://help.yourtradebase.com/article/79-using-email-templates
That’s it! These tags are live and ready for you to use in your email templates today. Happy tagging!
Always sending the same email? Turn it into a good-to-go template.
24 June 2019
Better communication = happier clients. Simple but true. So, with that in mind, we’re always looking for new ways you can keep people in the loop (and smiling).
YourTradebase already gives you a set of pre-written email templates you can use when you’re doing regular things like sending a quote or chasing up an invoice. You can adapt them to suit your company, job or specific customer, but they still don’t cover every eventuality.
So, we’ve made some improvements. From today, as well as using the email templates we’ve set up for you, you’ll be able to create and save your own, ready to use again and again. Which means more control over the messages you send – and when.
Say, for example, you always like to email customers to say thanks after they ask you to quote. Now all you need to do is create a new template, type that message in and save it. Then any time you need it, you’ll be able to open it up, tweak a few details and send it out. Boom.
No more typing out the same email over and over. Just fast, friendly messages in a few quick clicks. Happy customers, happy you.
Here’s how it works…
Creating a new template
- Just visit your settings > email templates
- Select ‘Add new email template’
- Give it a name (like “Thanks for asking me to quote”)
- Write out the subject and message
- Use tags to auto-fill your client’s name
- Include any attachments you’d like to send
- Hit save and we’ll add the template to your list, ready to use anytime
Using a new template
- Just open up a job or customer
- Choose ‘Send a message’
- Hit ‘templates’
- Pick the one you want
Bam! The email subject, body and any attachments will be pre-filled and ready for you to send. If you used tags in your email message, they’ll be ready for you to use, too. Need to tweak any details? No problem. Just make the changes you need and press ‘Send’. Job done.
Creating a set of email templates that matches the way you work could save you a tonne of admin time. You could even map all the messages you regularly send, from a customer’s first call to the day they pay – setting up a stack of good-to-go messages you can send in a few quick clicks. It might just be a game changer.
You’ll find more about email templates in our help docs
We’re super-excited about our latest update and we hope you find it helpful. Happy templating!
Faster, easier, friendlier messages
16 May 2019
If there’s one thing that keeps customers happy and jobs running smoothly, it’s fast, friendly communication. It’s something we really believe in – a powerful way to make a big difference.
So, today we’re launching a new update that makes it quicker and easier to send and read customer messages in YourTradebase. Here’s what it’s all about…
All your messages in one place
Before, messages had to be linked to a specific quote, invoice or event, which meant finding that message Mrs Jones sent last month involved a fair bit of digging around.
Now, all you have to do is choose your customer, and you’ll see the last five messages you sent or received. Want to see them all? No problem. Just choose ‘View all messages’.
You can also search for messages by job. Go to your job summary screen and you’ll find all the messages you’ve exchanged about that job. Easy.
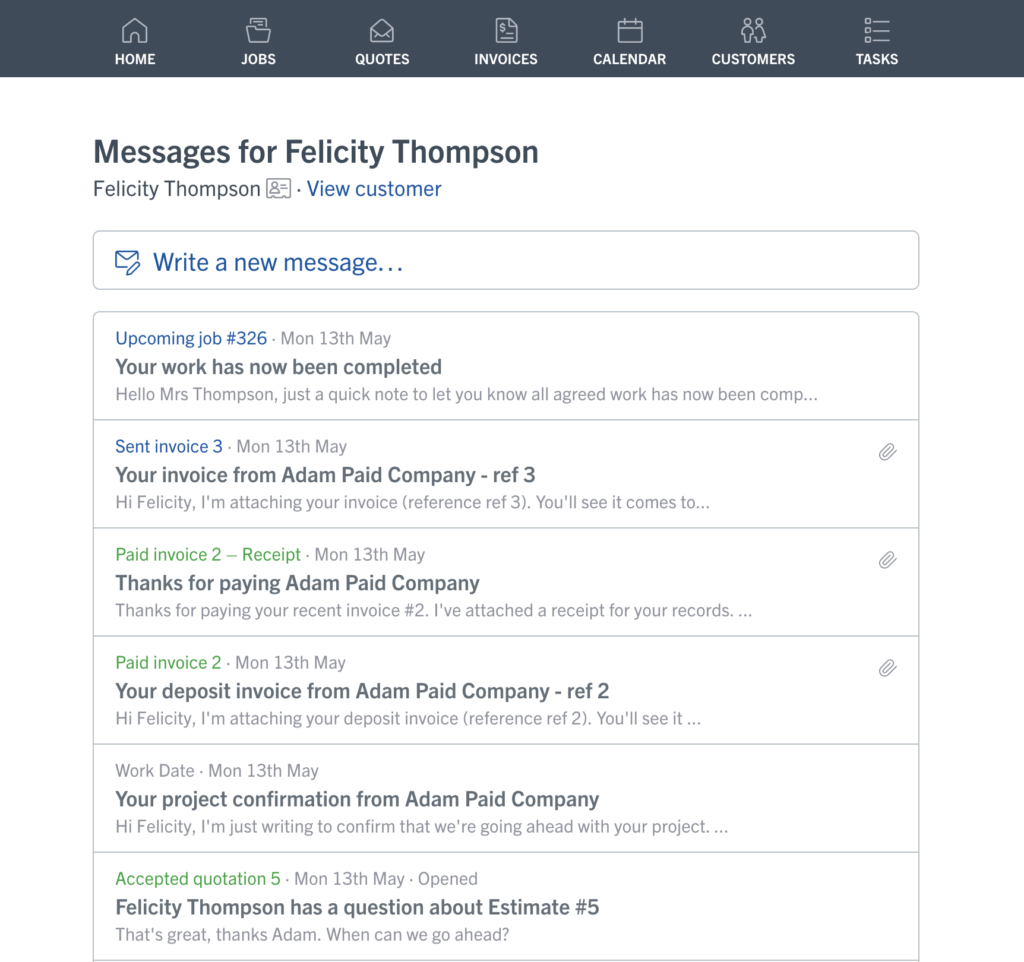
Super-simple message sending
Until now, you could only send messages to customers through quotes and invoices. That meant sending a quick update or keeping people in the loop was, well, not that straightforward. Being friendly and helpful was, in fact, a bit of a faff. So we changed it.
Now all you need to do is go to a job or customer, choose ‘Send a message’ and start typing. Hit send and we’ll make sure it wings its way to your customer, nice and quickly.
And of course, any message you send – or receive – will show up in your messages list for that job or customer. Just where it ought to be.
This is just the beginning. We really believe in fast, friendly communication and we’re working hard to make that as easy as possible, in all sorts of ways.
Stay tuned for more updates – and happy messaging!
Customer cards are here. All those essential contacts in one quick click.
1 April 2019
Finding your customers’ contact details really ought to be fast and faff-free. So today we’re launching a little update that makes it a lot easier. Say hello to customer cards, a one-click way to pull up all the details you need.
Until now, grabbing a customer’s phone number or email address meant stopping what you were doing, clicking on their name and looking through their customer page. That’s harder work than it should be.
Which is why we’re launching customer cards. From today, when you see the card icon next to a customer’s name, you can click (or tap) to pull up their customer card – showing their address, email and phone number.
You can call or email them instantly, just by clicking on the details in the card. And if you need more info about the jobs you’re doing for them, you can just click ‘View full profile’. Handy.
We think it’s a small change that’ll make a big difference. Want to see it in action? Here’s a (really) quick video…
That’s all there is to it. Super quick, super easy. Have fun!
